Wood Grain Guide: Pores, Rings, End Grain, and Lookalike Checks
Step-by-step wood grain guide explaining pores, ring-porosity, end-grain clues, and lookalike checks to narrow options and plan safe verification steps.
Quick answer for wood grain guide
This wood grain guide focuses on a small set of visual clues you can check in a photo or on a board to narrow the list of likely species: pore size and arrangement, ring-porosity pattern (ring-porous vs diffuse-porous), orientation and texture of the surface grain, and end-grain features such as vessel size and ray visibility.
Use these clues as filters rather than confirmations: they help eliminate large groups of woods and point you at a handful of plausible matches to compare more closely with reference photos or a specialist.
After you’ve checked visible clues, use a dedicated tool like Wood Identifier - Wudora on your phone to compare images and treat any app result as a research lead, not final verification.
What it means
A wood grain guide is a short checklist of observable grain features that change how experts and apps narrow candidate species. Rather than identifying a specific species from a single photo, this approach reduces possibilities by grouping woods with similar anatomy.
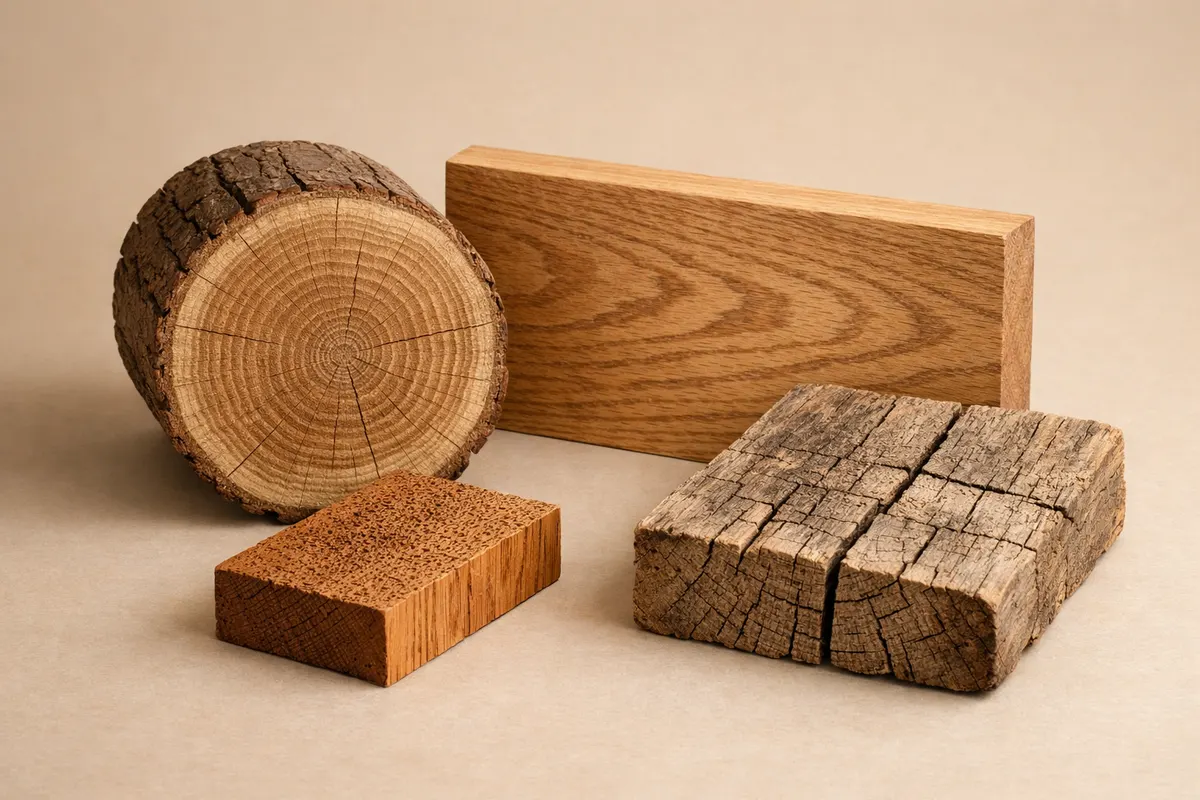
Pore patterns and growth rings reflect a wood’s vessel arrangement and growth behavior; surface grain shows texture and figure; end grain reveals internal anatomy like vessels and medullary rays. Together these clues separate broad categories such as ring-porous oaks and diffuse-porous maples.
Applying the guide means photographing or looking closely at the same board from different angles—face grain for pattern and figure, and end grain for vessels and rays—then recording the strongest clues before exploring close matches.
Key clues
Focus on a few high-value clues that are usually visible in photos: pore size and distribution, growth-ring definition, ray visibility on quarter-sawn ends, and whether the grain appears uniform or streaky. These clues are fast to scan and eliminate many unrelated species.
Note context details too: where the piece came from (flooring, furniture, reclaimed beam) and surface finish (stain or varnish can hide pore contrast). Context can move a candidate from unlikely to plausible even when anatomy is ambiguous.
If you can’t get a clean end-grain shot, prioritize pore pattern and ring contrast on the face; those alone often split the field between major families like oak, ash, walnut, and maple.
- Pore size and arrangement: visible, widely spaced pores usually indicate ring-porous woods (e. g. , some oaks); tiny, evenly scattered pores point to diffuse-porous species (e. g. , maple).
- Growth rings: strong, sharp ring boundaries suggest ring-porous growth; faint, uniform rings suggest diffuse-porous growth or juvenile wood.
- End grain: large distinct vessels and dark earlywood contrast are common in ring-porous species; tiny vessels and smooth texture suggest diffuse-porous species.
- Medullary rays: wide, reflective rays on quarter-sawn surfaces (visible as ribbons) point strongly to oak or related genera.
- Surface grain and figure: interlocked or wavy grain often signals species like mahogany, elm, or some tropicals; straight, even grain narrows toward ash, maple, and some pines.
Step-by-step workflow
1) Photograph and observe: take (or examine) one face-grain photo with scale and a close end-grain photo if possible. Note lighting, finish, and any staining that might hide pores. If you can’t photograph, bring a 10–15× loupe or magnifying glass to the end grain.
2) Quick triage: ask three yes/no questions—are pores large and seasonally grouped (ring-porous)? Are pores tiny and uniform (diffuse-porous)? Are rays or coarse texture visible on the quartered face or end grain? These answers cut the candidate set quickly.
3) Record the strongest clues: write down pore pattern, ring contrast, ray visibility, and surface figure. Use them to filter reference images; for example, if rays are wide and reflective, prioritize oak species in your search.
4) Compare with references: match your filtered candidates to high-quality reference photos or trusted field guides. If you have an app like Wood Identifier - Wudora, use it as a comparison tool after gathering the clues; treat the app’s suggested matches as leads rather than final proof.
5) Verify important outcomes: for safety, value, or restoration decisions, follow up with additional checks—smell, weight, tool marks, and provenance—or consult a wood expert or lab if identification affects safety, cost, or legal issues.
- Prepare: clean a small area so pores and rings are visible; use a light source at a low angle to bring out texture.
- Photograph: include a ruler or coin for scale; shoot end grain perpendicular to the surface to avoid distortion.
- Filter: apply pore/ring/ray clues to exclude large groups (e. g. , if diffuse-porous, don’t waste time on ring-porous genera).
- Compare: prioritize images and specimens that match multiple independent clues, not just color or appearance.
Examples
Example 1 — Reclaimed floorboard: The board shows very large earlywood pores concentrated at the ring boundary and a distinct light-dark ring pattern. On the end grain, large vessels and narrow rays are visible. These clues point toward ring-porous temperate hardwoods such as some oaks or ash; oak is higher on the list when rays are conspicuous on quarter-sawn surfaces.
Example 2 — Furniture top with smooth, even texture: Face grain appears uniform with very small, evenly spaced pores and faint ring boundaries; end grain shows tiny vessels and no broad rays. Those features fit diffuse-porous woods like maple or birch rather than oak or ash.
Example 3 — Wavy, interlocked grain on a chair arm: The surface shows pronounced ribbon figure and uneven banding; end grain reveals medium-sized pores and interlocked grain. That pattern matches certain mahogany relatives or tropical species and suggests comparing photos of common lookalikes rather than assuming a domestic hardwood.
When you want more structured comparison beyond these examples, try cross-referencing your notes with online references. A useful starting point for deeper comparison is the related overview, Wood Identification by Grain: Color, Pores, End Grain, and Next Checks (https://woodidentification. app/blog/wood-types).
Limitations
A single photo rarely produces expert-grade certainty. Finish, stain, weathering, and repairs can mask pores and ring boundaries; some species overlap strongly in superficial appearance. Treat any single-image match as provisional.
High-confidence outcomes are possible when multiple independent clues align (pore pattern + rays + provenance). Partial confidence occurs when only one or two clues are visible. When clues contradict or remain ambiguous, the correct approach is to gather more evidence rather than guess.
When identification affects safety, cost, or legal status (for example, hazardous species, protected timber, or high-value antiques), verify with hands-on inspection, material testing, or consultation with a qualified wood specialist. Avoid using app results alone for high-stakes decisions.
- High-confidence: multiple matching clues including end-grain anatomy and context (origin/use) agree.
- Partial confidence: face grain clues point to a family, but end grain or rays are missing or cut at a poor angle.
- Uncertain: stains, finishes, heavy weathering, or atypical grain obscure anatomy—seek physical verification.
Try Wood Identifier - Wudora after your visual checks
After you’ve recorded pores, ring pattern, end-grain features, and any contextual clues, use the Wood Identifier - Wudora app on your phone to compare photos and explore suggested matches. Treat app results as research leads: confirm important identifications with additional photos, provenance, or a specialist before making high-stakes decisions.
Frequently asked questions
How do I tell ring-porous from diffuse-porous woods in a photo?
Ring-porous woods show large pores concentrated in the earlywood band at the start of each growth ring, producing a visible light/dark banding on the face and large vessels on the end grain. Diffuse-porous woods have small, evenly distributed pores with little ring contrast. Look for grouped large pores versus a uniform pore texture to decide.
Can I identify wood from color and grain alone?
Color and broad grain alone are unreliable because staining, finish, and age change appearance. Use color as a supporting clue but rely more on pore size and distribution, growth-ring definition, end-grain vessel pattern, and ray visibility for a narrower, more objective shortlist.
What is the single most useful photo to take for identification?
A clear end-grain photo with a scale is often the most informative single shot because it reveals vessel size, arrangement, and rays—features that separate ring-porous from diffuse-porous species. If an end-grain shot isn’t possible, a well-lit face grain that shows pores and ring contrast is the next best option.
When should I consult a professional instead of relying on a guide or app?
Consult a professional when identification affects safety, purchase price, legality, or preservation (for example, protected woods, antique valuation, structural timbers, or suspected hazardous material). Also seek hands-on verification if visible clues are ambiguous or the item has been heavily finished or altered.