Wood Grain Patterns: Rings, Pores, Rays, and Texture Clues
Understand which wood grain patterns photos reveal, which clues are reliable, and how to compare rings, pores, rays, and texture before trusting an ID.
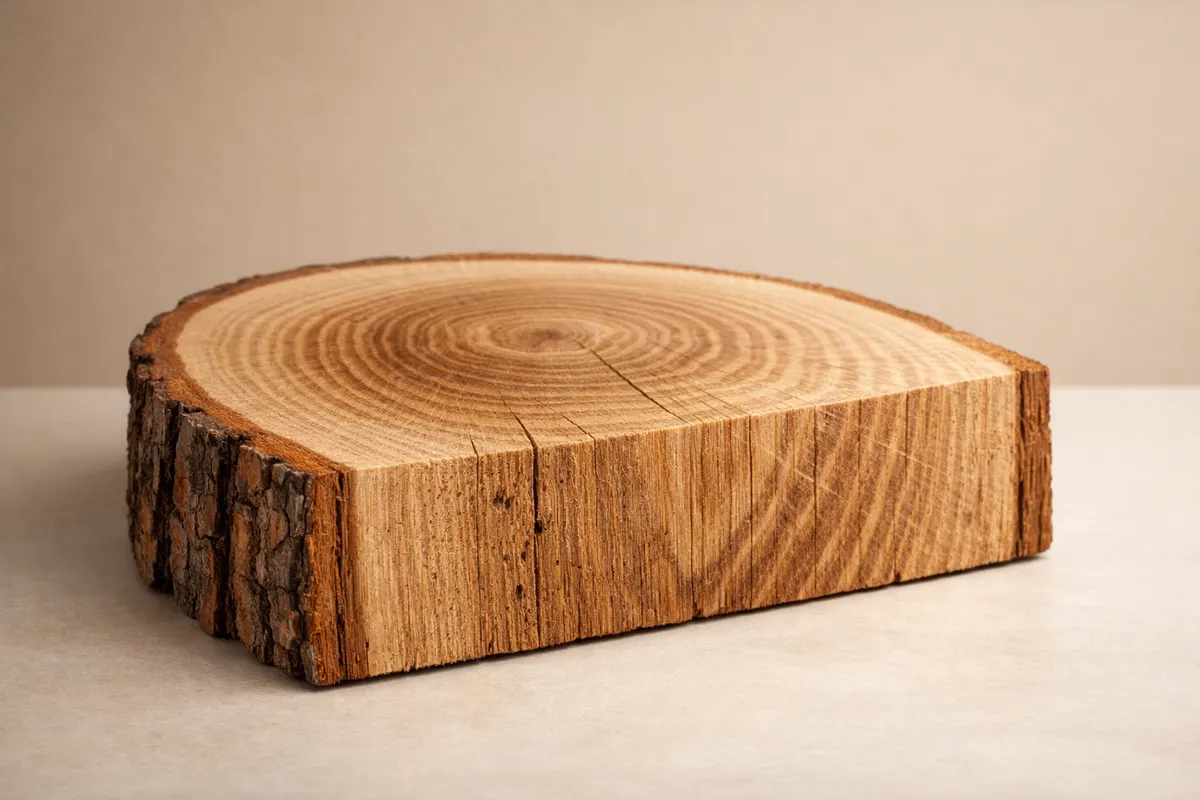
Quick take: what grain patterns reliably show
Wood grain patterns often give strong, usable clues in a good photo, but a single image rarely proves a species. Look first for pore arrangement (ring-porous vs diffuse-porous), prominent medullary rays, and the presence or absence of distinct growth rings. These features are structural and usually visible across finishes, weathering, and light conditions.
If a face or end grain photo shows wide earlywood pores in bands (ring-porous), strong radial rays, or a very consistent diffuse pore pattern, you can eliminate dozens of lookalikes quickly. For example, broad rays centered on the face are a dependable signal for many oak species, while ring-porous bands often point toward temperate hardwoods like oak or ash.
Treat color, sheen, or single-angle texture as supportive, not definitive. Use the visible clues as a checklist to form a short list of candidates, then gather a second angle or an end-grain shot before you lock in a name. When in doubt, treat your photographic ID as a research note rather than a final appraisal.
- Most reliable photo clues: pore arrangement, medullary rays, and ring contrast.
- Supportive but weak clues: color, finish, and single-angle surface texture.
- Use multiple photos or a close-up of the end grain to confirm initial impressions.
- When clues conflict, record context (location, object type, age) and proceed cautiously.
Strong visual clues to prioritize in photos
Start with pore architecture: whether pores are grouped in bands (ring-porous), evenly distributed (diffuse-porous), or scattered (semi-ring-porous). Pores are anatomical features formed by vessels and are often visible as tiny dots or lines on the face and very clear on the end grain. A single, well-lit close-up that shows pore distribution will eliminate many species that share color or surface figure.
Medullary rays (rays) are another top-level clue. Rays appear as light streaks across the grain when cut along the face, and they stand out on quarter-sawn surfaces or after light sanding. Large, wide rays are typical of oak and can be the fastest way to separate oak from other similar-looking hardwoods. In contrast, small, faint rays are common in species like walnut and cherry.
Growth-ring contrast — the visual difference between earlywood and latewood — tells you about ring-porosity and annual ring visibility. Strong ring contrast often indicates a ring-porous species or a tree grown in a climate with distinct seasonal growth; subtle or indistinct rings are more likely in diffuse-porous tropical woods. Ring contrast also helps with dating rough-sawn boards and assessing whether what you see is sapwood or heartwood.
Texture and figure (curl, quilt, fiddleback) are useful when they are clear and repeatable across a surface. Figure results from variations in fiber orientation and density and survives many finishes; look for directional shimmer or predictable repeat patterns. Coarse texture and deep open pores are visible even in lower-resolution phone photos and are therefore practical first checks.
End-grain detail is often decisive. A poor-quality face photo may hide pore size and distribution, but a focused end-grain shot reveals vessel size, arrangement, and ray height. If you can get an end-grain view, compare it against the candidate list and prioritize anatomical matches over color or finish.
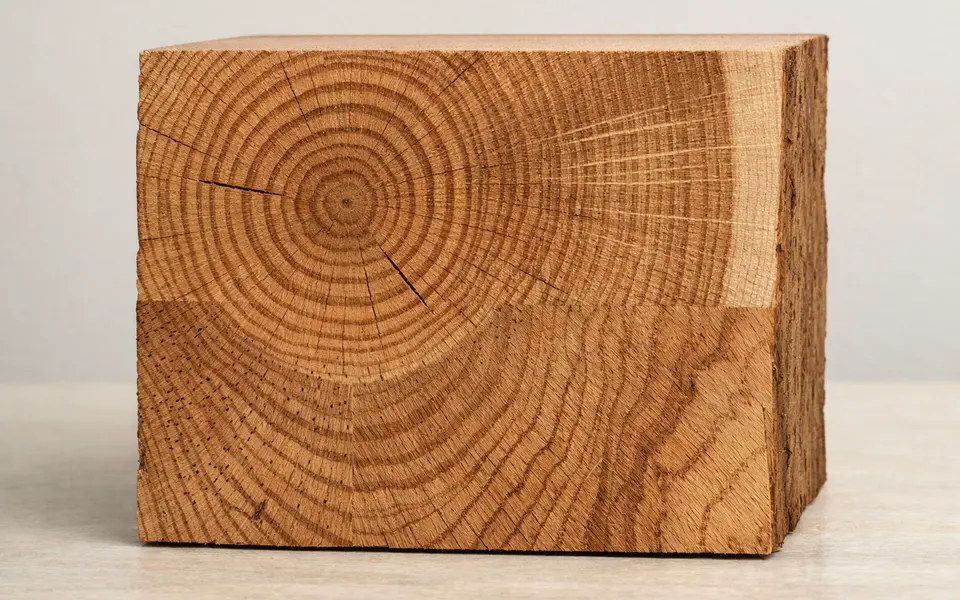
- Pore pattern: ring-porous, diffuse-porous, or semi-ring-porous — primary eliminator.
- Medullary rays: wide and bright rays point strongly toward oak and similar species.
- Growth-ring contrast: signals climate growth patterns and ring-porosity.
- Texture/figure: curl, fiddleback, or coarse open pores survive finishes and photos.
- End grain: reveals vessel size and ray height — often the tie-breaker in IDs.
Weak or misleading clues to treat cautiously
Color is unstable. Sunlight, finish, varnish, oil, and aging change appearance quickly; many different species can look similar when stained or aged. Avoid using color alone to identify wood. If color is your only evidence, expand your checklist and gather more physical clues before assigning a species.
Single-angle photos and glare hide or exaggerate texture. Reflections from glossy finishes can obscure pores and rays, while low-angle lighting can create false depth and shadow that mimic figure. Always take at least one evenly lit, perpendicular shot to reveal pore distribution without specular highlights.
Knots, spalting, machine marks, and fungal staining are surface features that complicate identification. They tell a story about the board's history but not about its species reliably. For example, spalting patterns or wormholes might make pine look darker or more patterned, but they do not change the underlying vessel arrangement.
Small pores and microscopic ray elements are invisible in most phone photos. Species that differ only in minute pore size or tiny ray structure require a microscope or a well-prepared end-grain cut for confident separation. If your candidate species differ on such subtle anatomy, mark the ID uncertain and plan for a closer inspection or laboratory confirmation.
- Color, finish, and patina are unreliable alone — use as supporting evidence only.
- Glare and single-angle shots can hide pores or make rays appear stronger than they are.
- Surface defects (knots, spalting, stains) can mimic or mask grain patterns.
- Microscopic distinctions (very small pores or ray cells) cannot be resolved with a standard phone photo.
Comparison workflow
Turn visible clues into a checklist. Start by listing the strongest features you observed: pore arrangement, presence and width of rays, ring contrast, and any distinct figure. Rank them: which clues survive across finishes and lighting? Use the top two to create an initial filter that removes obvious non-matches.
Gather comparison photos that target those top clues. For pore arrangement, a face photo at moderate magnification is usually sufficient. For rays and ring contrast, include a quarter-sawn face or a close-up of the end grain. If you can, add a scale reference (ruler or coin) to judge pore size; that helps separate species where pore diameter matters.
Compare patterns systematically. Lay candidates side-by-side and ask three structured questions: (1) Does the pore arrangement match? (2) Do ray size and visibility align? (3) Is growth-ring contrast consistent with the candidate’s ecology (temperate vs tropical growth)? If two or three answers are yes, the candidate moves up in likelihood.
Watch for lookalikes and document uncertainties. Common traps include oak vs ash (both can show strong rings) and walnut vs stained mahogany (color mimicry). If anatomical clues conflict — for example, ring-porous pores but no rays where rays should be visible — mark the photo inconclusive. Save your results and any notes about context (object age, geographic origin, and use) to guide follow-up or consultation with a wood specialist.
- Make a short checklist from top clues and use it to filter obvious non-matches.
- Take targeted comparison photos: face grain, quarter-sawn face, and end grain with scale.
- Ask three comparison questions: pore match, ray match, and ring-contrast match.
- Record lookalikes and conflicting clues; treat any conflict as a reason to seek more evidence.
App workflow
Use an app like Wood Identifier - Wudora as a structured second opinion, not as a final authority. After you’ve run the checklist and gathered key photos (face, end grain, and a scale reference), run the same images through the app to get candidate suggestions. Treat the app’s results as hypotheses to test against your strongest visible clues.
If the app’s top suggestions align with your pore and ray observations, you’ve narrowed the candidate list efficiently. If the app suggests species that conflict with anatomical features you observed, revisit the photos: get a clearer end-grain shot, reduce glare, or note if a finish or stain could be altering appearance before discarding the app’s output.
Record app results as research notes. Save the app’s candidate list alongside your checklist and context (where the piece was found, likely geographic origin, and the object’s function). This helps you track patterns across multiple items and avoid overconfidence from a single automated suggestion.
If you want a deeper checklist or rules-of-thumb to apply before and after using the app, consult the Wood Visual Checklist: Common Clues, Lookalikes, and Next Steps for a structured companion approach that pairs manual observation with automated scans. Use the checklist to interpret the app’s output rather than treating the app as the definitive answer.
- Treat the app as a second opinion: use it after you collect face, end-grain, and scale photos.
- Compare app suggestions against pore arrangement and ray visibility before accepting them.
- Keep app outputs as notes with context — origin, object, and any finishes present.
- When app results conflict with anatomy, gather new photos or consult a more detailed reference.
Related guides
Use Wood Identifier - Wudora after your visual checklist
Once you’ve checked pore patterns, rays, rings, and texture, run your focused photos through Wood Identifier - Wudora as a next-step scanner and comparison tool. Treat the app’s suggestions as candidates to compare against your anatomical notes rather than as final verdicts. Save the app’s results with the photos and any context—where the piece came from, whether it’s finished or weathered, and any end-grain details—so you can revisit or share the evidence if you pursue expert confirmation. If a match matters for safety, value, or regulation, follow up with a specialist or a microscopic examination rather than relying on a single tool.

Frequently asked questions
How can I tell ring-porous from diffuse-porous wood in a photo?
Ring-porous woods show large pores concentrated in the earlywood bands of each growth ring; in photos these appear as conspicuous rows or lines of larger dots or open pores. Diffuse-porous woods have pores distributed evenly across the ring and lack a clear banding effect. A perpendicular face photo or a clean end-grain close-up with scale makes this distinction easiest. If lighting or finish hides pore size, get a sharper end-grain image before concluding.
What do medullary rays tell me, and when are they visible?
Medullary rays are radial sheets of tissue that appear as streaks or ribbons on quarter-sawn faces and are very prominent on some species like oak. Their width and frequency separate species groups: wide, bright rays usually indicate oak or similar genera; narrow, subtle rays suggest walnut, cherry, or many tropical hardwoods. Rays are most visible on quarter-sawn surfaces or after light sanding; on flat-sawn boards they can be faint or broken by knots and figure.
Can I identify wood species from a single smartphone photo?
Usually not with high confidence. A single phone photo can often eliminate many candidates and give a probable direction, but it rarely captures the full anatomy required for a definitive ID. Important microscopic or end-grain details may be missing. For non-critical uses, a single photo plus contextual information (where the board came from, how it was finished) can be sufficient to form a short, useful candidate list. For any critical identification — legal, safety, or high-value decisions — seek closer inspection or expert confirmation.
What are the best photo techniques to capture grain clues?
Take multiple photos: a straight-on face shot under diffused light, a closer end-grain photo with a sharp focus and scale, and an angled or quarter-sawn face to reveal rays and figure. Avoid direct sun or glossy reflections; place the light source off to the side to reveal texture without specular glare. Use a steady surface or tripod, get close enough to show pore structure while keeping a scale reference, and photograph both finished and lightly sanded areas when possible to compare surface effects with raw anatomy.