Types Of Oak Wood
Types of Oak Wood: Visual Clues and Safe Next Steps
Learn the visual clues that separate types of oak wood and what to check before using a photo ID. Practical signs, limits, and safe next steps.
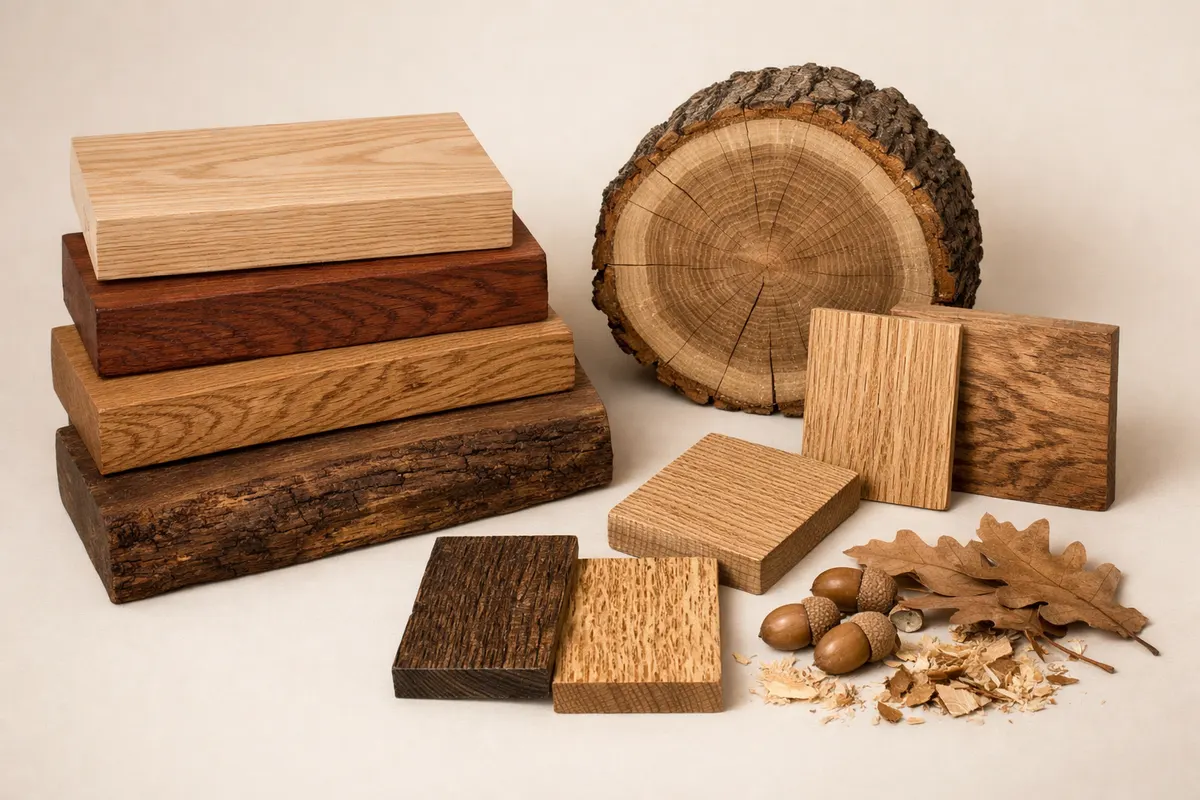
This category helps you identify common types of oak wood from visible signals so you can narrow red vs white oak groups before running a photo identification. A careful look at color, pore pattern, rays, and exposed edges often rules out broad categories even if it doesn’t confirm a single species.
Use these checks as a first pass: they make a photo-based result faster and more reliable because you’ll know where to place focus—endgrain, quarter-sawn faces, or exposed cores behind veneer. The goal is a sensible next step, not a final appraisal from one image.
When you’re ready to confirm, use an app scan or snapped photo on your phone to report likely group, visible evidence, and confidence indicators. Keep the physical clues in mind so you can evaluate the app’s result and any remaining uncertainty.

How identification works
Step 1
Snap a photo
Take a clear, well-lit photo of your item in the Wood Identifier - Wudora app.
Step 2
Get an instant identification
The app reads the visible clues and returns the closest matches in seconds.
Step 3
Review the details
Compare the result with your photo, review any uncertainty, and check the suggested next steps.
How to spot different types of oak wood by eye
Check these observable signals on the surface and exposed edges before you photograph a sample. Each signal narrows possibilities and helps you pose the photo to show the most diagnostic details.
If you can capture a small endgrain or a quarter-sawn face, that single additional view often separates white-oak-group from red-oak-group species because of ray visibility and pore arrangement.
Record simple context: is the board a solid plank, a veneered panel, or plywood edge? Construction clues are often as decisive as color or grain when identifying types of oak wood.
- how to identify white oak — look for paler tan to light-brown color, very visible medullary rays on quartersawn boards, and tighter, less open pores.
- how to identify red oak — check for pinkish or warm reddish-brown tones, larger open pores in growth bands, and less prominent rays on plain-sawn faces.
- black oak wood — note darker heartwood streaks, coarser texture, and variable pore size; black oak can read darker than other red-oak relatives.
- live oak wood — find dense, fine-textured grain and often very tight growth rings in older live oak timber; it feels heavy and close-grained.
- Exposed edges and endgrain: bare endgrain reveals pore size and arrangement—ring-porous structure is a classic oak signal.
- Finish and stain can mask color; lift a small chip of finish or check an unfinished edge to compare natural tone and pore contrast.
What the identification includes
A proper category result for types of oak wood lists the likely group (red or white oak), a short list of candidate species, and the key visible evidence that supports each candidate. Results also state confidence and what evidence is missing.
Expect concrete fields: item type (board, veneer, panel), visible grain notes (rays, pores, ring-porous pattern), likely species group, and suggested next checks you can run physically or photographically.
Results also offer care and finishing notes tied to the identified group—for example, white-oak woods take different stain tones and finishes than red-oak woods—and practical cautions about veneers and modified materials.
- Item type: solid, engineered, or veneered panel and where the diagnostic face was found.
- Group and candidate species: red-oak group or white-oak group plus 1–3 likely species and the visible clues used.
- Confidence level and missing evidence: which photos would raise confidence (endgrain, quarter-sawn face, cross-section).
- Care notes and common uses: whether the wood is typical for flooring, furniture, or outdoor use and any routine care tips.
- Example references: links to wood visual guidance like the Wood Identification by Grain checklist when you need deeper grain-based checks.
Commonly confused with
Oak is often confused with ash, elm, hickory, and some stained maples. A photo can catch the differences if it shows pores, rays, and a clear edge or endgrain. If the surface is veneered, look at the panel edge for a true indicator.
Ash and oak both show ring-porous structure, but ash usually lacks the broad medullary rays that quartersawn oak shows. Elm has interlocked grain and a different pore pattern; contacting the exposed endgrain helps separate them.
Stained maple and plywood faces are frequent false positives—stain hides pores and veneer can mimic oak’s surface grain. A clear photo of an exposed end or plywood core rules this out quickly.
- Ash: similar ring-porous look but usually no large rays; endgrain pores differ in arrangement.
- Elm: interlocked grain with distinctive flecking, not the straight rays of quartersawn oak.
- Hickory: tougher, more variable color with denser, more erratic grain than oak.
- Veneer/maple: smooth surface with oak-like patterning—check panel edges and core to confirm solid oak.
Frequently asked questions
Can I identify an oak species from a single photo of the face?
A single face photo can often narrow the piece to the oak group (red vs white) by color, pore pattern, and rays, but it rarely proves a species. Endgrain or a quarter-sawn view raises confidence; expect the app result to list candidates and note what additional images would confirm one species.
What should I photograph to make an oak identification reliable?
Photograph an unpainted face at high resolution, an exposed edge showing thickness and layers, and an endgrain or quarter-sawn face if available. Include a small ruler or coin for scale and natural, even lighting to reveal pore size and ray visibility.
How much can finish or stain affect identifying oak?
Finish and stain change surface color and contrast, which can mask natural tones and pore visibility. Where possible, photograph an unfinished edge, a scraped spot behind a furniture base, or a factory cut to show the true wood beneath the finish.
Is it safe to rely on a photo ID for value or authenticity decisions?
No. A photo ID is a practical first pass but not a professional appraisal or proof of authenticity. Use a photo result to guide next steps—detailed inspection, lab testing, or a qualified appraiser—before making value or provenance decisions.
Related guides
Use Wood Identifier - Wudora to narrow oak types
After you check the visible clues above, open Wood Identifier - Wudora and snap photos showing the face, an exposed edge, and any endgrain. The app reports likely group, candidate species, visible evidence, and confidence so you can decide on follow-up checks. Get the app at https://woodidentification.app/ and treat the result as a focused next step, not final verification.